It took 4 months to grow this picture; a single second in the garden to “see” it; and 8 hours of computer work to clean it up.
The one second part is easy to explain. Last Saturday was a garden day and when I walked the garden wondering where to start, what undone chore would be tackled first, I brushed under my ‘Apple Blossom’ rose, rambling and tumbling down from tree pillars. That truss needs to be properly photographed. Instant inspiration after years of never getting it quite right.

When I started this garden my very first big idea was to plant rambling roses under the row of ugly Eucalyptus trees at the edge of our property so that they could grow up and engulf them. I have been very pleased with the effect but never got a decent photo. In recent years the floral show diminished as the trees shaded the roses.
So last February I topped the trees and girdled their trunks.

They are trees no more. They are now magnificent pillars 30 feet tall. And now 4 months later the roses, particularly ‘Apple Blossom’, have responded and are flowering like crazy.

I suspect next year will be spectacular after a year’s growth and full sun on those tall pillars but it was last Saturday that I realized I needed to take this rose into the studio. The peak bloom of a truss is one day and one truss brushed me.
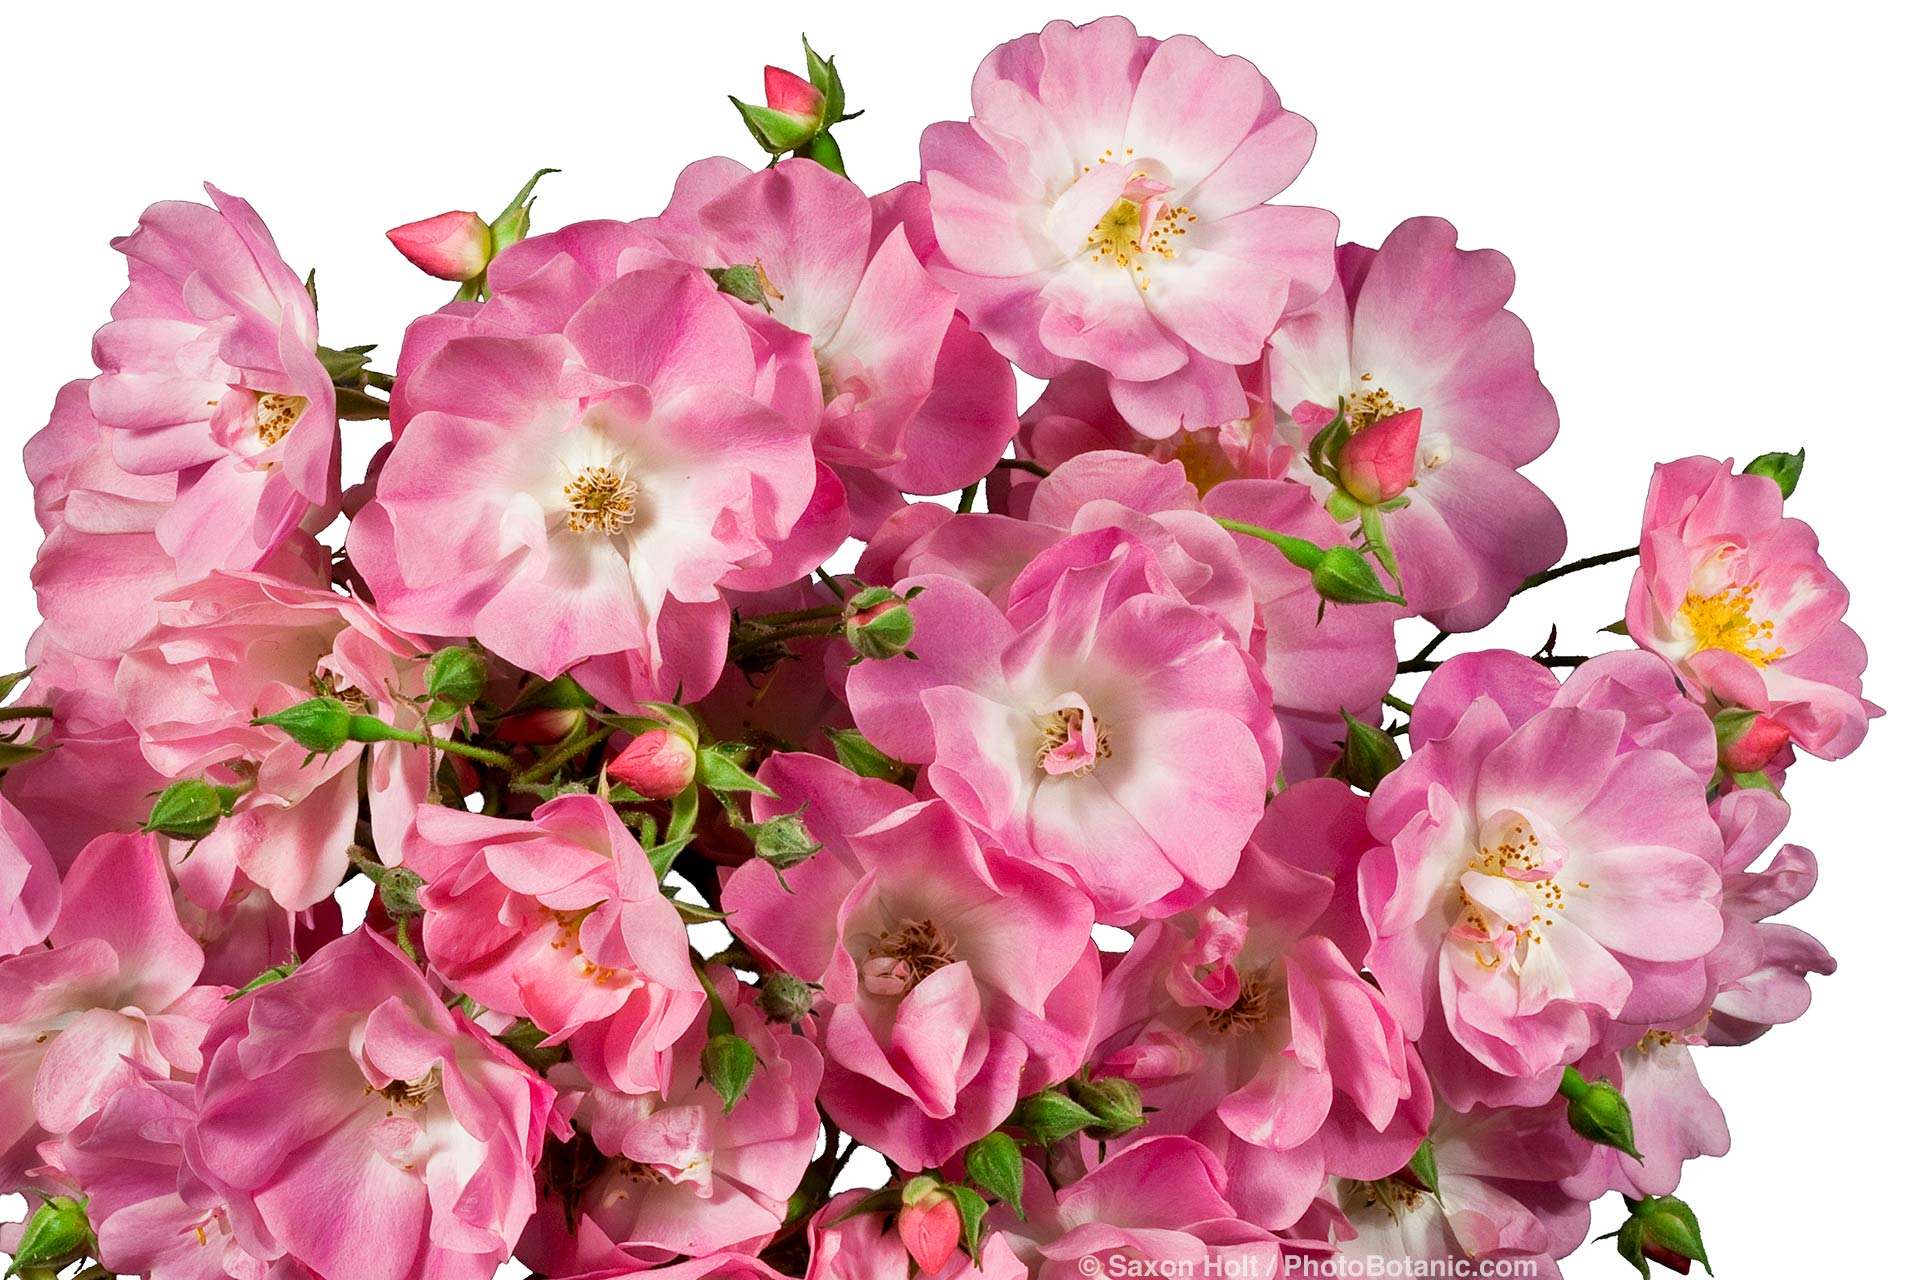
It was huge truss, buds still unfolding, some fully open, and some at perfection with stamens still bright and yellow. It was so big I could not make it stand up in the vase and needed a clamp to hold it for the camera.

Once I had the photo it needed lots of work to create the PhotoBotanic effect, a silhouette on white, inspired by the masters of botanic illustration. I can’t shoot these against a white background to achieve the effect because for one, when lit, a white background creates flare into the camera lens, muting the colors. And even more importantly, the white of a photo background is never a true even white, and photo masking is much easier with dark colors.
So I began with the Topaz Remask3 filter.

And then went into all the small “holes” or gaps between flowers where the background color peeks through and carefully painted in the white mask. (In the enlarged photo that opens this post you can see some of those small gaps that needed to be white). Even with this special plugin for Photoshop, I needed to clean up some edge halos created by the filter.
Finally, I enlarged the photo canvas so that I could add type and a line to give the photo a nice definition on the paper which is now proportioned for 8×10 or 16×20 print sizes.

So, 4 months after I topped those trees, it all came together. Just like I planned. <g>